


18 Steps To Fearlessly Create Bestselling Products In Under 14 Days With No Prior Experience
Table of Contents
Whether you’ve never created an info product before, or you’ve created dozens that may not have sold as well as you hoped, this short guide is for you.
Personally, I have always found that when I have a step-by-step plan to follow, I am more efficient and productive.
Let me be upfront – the only thing I’m not covering in this article is niche selection. I’m also not diving into niche market research to ensure your upcoming product has an actual market.
The focus right now is to help you create the best product possible with the highest sales potential, while boosting your credibility in the process.
For the purposes of this tutorial, I’m going to assume your product is an ebook, but the steps to making any kind of info product are similar.
Before you roll your eyes at the idea of info-product creation because you’re a coach or personal trainer, take a step back. I have yet to meet a business owner or marketer who doesn’t need a strong info-product as a lead generation tool (lead magnet) to build subscribers, a thank-you giveaway, an upsell and the list goes on.
My point is this – everyone who is selling something could use a strong info-product to compliment their brand and boost engagement.
Preparation: Getting Ready To Create Your Product
1. Narrow your focus so your product is highly-targeted.
Arguably, the most difficult step in creating your product is figuring out just what exactly you’re going to write about. What problem to tackle. What solution to provide. And what narrative to tell.
I’ve written dozens of e-books for clients over the years and in my experience the most common mistake (been guilty of this myself) new creators make is trying to cover everything about a topic. You’re not Wikipedia, and you’re not writing a two-hour documentary.
If you let yourself fall into this hole, you’ll end up with a generic piece of content with little targeted benefit to anyone.
So instead, you want to narrow your focus as much as possible. For example, instead of “How to win at cards” which is too broad, you might narrow it down to “How to win Texas poker.” And you could narrow it even further to something like, “How to win Texas poker when you’re playing against a professional.” Now that’s specific and highly marketable.
Never worry about being too specific. In my example above, that ebook would have a larger demographic than you may think. After all, the professional will also buy the book to make sure he or she knows what the amateur is going to do.
2. You are the expert now so accept and embrace it.
You write a piece of worthy content from an authority perspective, you become the expert.
The moment you start to create your new product, or even think about creating your new product, a nasty little voice is going to tell you that you don’t know enough. “You’re not an expert.” Surely, there are people who know far more about the topic than you.
The voice is correct. There are and will always be people who know your topic better than you do. But that’s irrelevant – that can be said about any expert no matter how famous.
You only need to know the topic better than 90% of people. Those are your customers. And they are the ones who will buy your hard work.
Do your research and fill in any knowledge gaps you may have. Essentially, find out what you don’t know, and learn enough to know more than 90% or 95% of other people.
You don’t need to be the world’s foremost expert on the topic to create a valuable piece of content on it, you just need to know more than most. And you must be able to educate and explain in a way that someone who knows very little can easily understand.
3. Time to develop your outline.
Now it’s time to take a giant leap forward in your progress. In fact, what you do right now will save you time and make your product better. The more effort and time you put into this step, the faster the rest of the process will go for you.
You’re going to create a detailed product outline – a roadmap of your info product. This will keep you from getting overwhelmed or going in the wrong direction.
Fill your outline in with as much detail as possible. I strongly suggest you at least include the following:
- Chapter headings
- Topics
- Subtopics
- Related and entertaining stories
- Personal narratives you can include
- Testimonials or real world examples
- Specific actions or choices your reader can make to follow suit
- Notes on potential graphics, illustrations or original photos to enhance your specific points
If the order of your chapters or sections doesn’t feel right, rearrange them until they make sense.
If you want a super simple outline maker tool, try this: http://www.crlsresearchguide.org/NewOutlineMaker/NewOutlineMakerInput.aspx
If you’re stuck at any point, don’t worry about it. Relax and take a breath and just starting writing. You already have your outline, and you know where your content is going. Now you just need to get it down on paper.
The only way to do that, is to do it. Start writing, rearranging, adding graphics and information until you’re completely satisfied.
4. Switch up your perspective with fresh eyes and look again.
Thanks to your outline, you know exactly where you’re going, and you know how to get there. But most likely you forgot something. Or possibly overlooked a helpful piece of info that your readers would enjoy. That’s normal! Happens to me all the time, which is why I developed this rule.
Walk away for 24 hours.
You’re now going to look at your outline (and any content you already wrote) with fresh eyes. You’re no longer “you,” you are your potential customer looking over this product. Ask yourself these questions:
What did I miss?
Is there an easier way that’s more relatable to explain this concept or that idea?
Is there anything I would want as a customer that isn’t included?
Do my personal anecdotes move the point along and help illustrate my content, or does it come across as egotistical?
Now go to Amazon and find books on your niche. Use the “look inside” feature to study their table of contents. You’re looking for more things you may have left out of your product.
Fill in the holes, expand sections if needed, and see if you’re inspired to add anything new. You may discover that you need to change headlines or focus more on specific sections.
Is there enough meat in your content if you stick to your outline?
5. Make your product unique so it stands out.
As we all know, there are tons of information products out there, with more added every day. So here’s the important question – what makes your info product unique?
Now this is a two-part answer and I can hand you the first part. Your product is unique because you and your perspective is unique. That may sound like a cliché, but it matters.
This is why your product must convey and showcase your own uniqueness. Your message, your style, your very essence should permeate through the product, whether it’s written, audio, video or whatever.
Don’t let yourself create another generic product with a voice like any other talking head. Pretend you’re sitting down on your comfy sofa, explaining this topic to your closest friend.
That, right there, is the atmosphere and feel of your product. If you’re known as a humorous person, be funny and let your sense of humor shine in your pages.
Whatever you are when you are being yourself, that’s the voice you want to use in creating your product.
The second half of what makes your product unique is going to be by design – it’s your angle, your hook, or your unique selling proposition (those are all pretty much the same thing).
Determine what makes your info product different from any other on the same topic. Find your angle and squeeze it.
Choosing your angle or USP is vital. This is how you’ll produce a product that stands apart from the rest and commands people’s attention. Take your time on this step because it’s critical to the overall success.
And be sure you write it down and keep it in front of you as you continue this process. Check in on the sheet occasionally to make sure you’re sticking to your unique selling proposition.
6. Set a deadline for yourself and stick to it.
At this point you might be thinking the hard part is over, you’ve got this handled, and your product is practically created.
Nope. Not even close – sorry to say.
It’s the false sense of security we get from having made a start that often derails us. Sure, we’ll get to it. Maybe we’ll work on it later today. Which becomes tomorrow. Which becomes next week and then maybe never.
That’s why you’re going to pick a number and make a schedule. And most importantly, you’re going to stick to that schedule. No excuses. No justifications. And no distractions.
Make a pact with yourself and your family. You won’t be available during your scheduled writing times. And when it’s time to write (or record videos, or whatever) then do it.
But what about that magic number? That number is how many days you’re going to work on creating your product. If you can do it in five days, that’s terrific. If you need 10, then so be it.
Above all, don’t allow yourself a number above 14. Any info product can be created in two weeks or fewer. If you can’t, most likely your topic is too broad, and you need to narrow it down and focus.
So pick your number, then divide your outline into that many parts. Schedule your time each day to work it.
Now, do it.

Execution: Creating Your Product
7. Write a phenomenal, engaging introduction.
When to write your product introduction? There’s no right or wrong here, do what works best for you. I have found that writing the introduction last allows me to craft a more engaging intro. That’s just my experience.
Regardless of when you write it, you must know that your introduction sets the tone for the product.
It’s really the “after purchase sales letter” for your product. It’s the first thing your new customers will read after they make the purchase, but before they begin chapter 1 (or video 1).
Just like in a fight, you need to come out swinging. Be aggressive. Just because they already paid for it, doesn’t mean you can get lazy. In fact, the very first paragraph of your intro should be so compelling that no one could stop reading after that paragraph. Think engaging and pretend you’re still selling it to them.
In reality, you are still selling your product. This is the paragraph that you use to convince your customers to devour every word you wrote.
Why should you care if they devour the product after they already bought it?
Three reasons:
First, if they don’t read it, they’re more likely to regret their purchase and request a refund. Also, by selling them in the intro on how this product is going to change their lives for the better, you are reinforcing how smart they were to purchase the product in the first place. Everyone likes to feel that they made the right choice.
The second reason to write a phenomenal introduction is even more important than the first.
If your new customer loves your product, what will they do next? They’re going to become fans. They’re going to open your emails and actually read them. And they’re going to buy your future products because they have confidence in you.
And the third reason is all about future sales. You never know where you next big affiliate will come from, but it’s highly likely it’ll be one of your new customers. The better your product, the more affiliates will want to promote it to their email list. That makes the more sales you make and the newer customers you have on your mailing list with no additional effort.
So whether you write your introduction before or after you create the product itself, just make sure it’s an amazing, compelling intro.
8. Don't hold back on the headlines - use them liberally.
Statistically, site visitors read only 25% of what’s on a web page and only about half of what’s in an ebook or online course. But, there’s an upside here because they read over 90% of headlines and subheads. Knowing this means you know what you need to do to capture someone’s attention; use lots of headings and subheadings everywhere.
You can write these as you go or wait to add them in when you’re finished. It doesn’t matter. What matters is that your headlines and subheads are compelling and entices the reader to continue reading – or watching if you’re using video.
Speaking of which, how do you use headlines in videos?
If you’re doing Camtasia videos, just place the headlines in your slides. If you’re doing screenshots, you can still do slides with headlines. And if it’s a talking head type of video, you can write the headline on a whiteboard or even note cards in view of the camera, you can speak them with emphasis or add them in later through editing.
9. Be a good storytelling and integrate relevant stories.
Whenever possible, illustrate your points through storytelling. In fact, it’s a good idea to go through your outline and look for places you can use stories to get your points across. People love stories and actually have a much easier time remembering your points if they’re encapsulated within a story.
Personal stories also humanize you and help to build trust and loyalty to your brand, so pepper in some personal anecdotes whenever relevant.

10. Ignore internalized doubts and take control.
Sometime in the creation process, you’re going to be revisited by that annoying voice in your head. The one who calls you a pretender and says you’re not an expert. The one saying you have no right to create an info product and charge for it.
What should you do?
Jump onto a news site and look at the people in the stories. As you look at each person, ask yourself whether that individual knows what you know about the topic you chose.
The answer will be a loud “no” 97% of the time.
You know why? Because you put in the effort to research and learn, making you more of an expert than 97% of people on this planet. So stop doubting yourself and get back to work.
11. Stick to your outline and hold yourself to task.
You put a lot of time, effort and thought into your outline, so be sure to follow it. If you start diverging from the outline, change the outline to see if your new track is going to work. If it doesn’t, head straight back to the original.
12. More illustrations are always better if they're relevant.
Add graphs, pictures and illustrations anywhere it will help to illustrate what you’re teaching. Most people are visual learners, so it’s easier for people to learn when they can see what you’re talking about.
And, a strong visual is just as good as a headline. It grabs attention and motivates people to keep reading.
My general rule with visuals is that if it’s relevant and adds to my content – it goes in.

13. Once done, take 24 hours off before editing it.
This should be non-negotiable. When you’re done writing, you must force yourself to take a break for at least 24 hours before you edit your work.
As you read it, look for anything that might be difficult to understand and either reword it or elaborate on the point to make it crystal clear.
Any language that is confusing should be eliminated. No one likes incessant rambling.
Imagine that you just bought this piece of content with little to no knowledge of the topic. Now, sit down and read your work as if you’re reading it for the first time. Read it out loud. Ask yourself the following:
- As a newbie, you would understand the content?
- Were you bored as you read your words?
- Did the content keep your attention?
- Is there anything missing or portions you would like expanded?
Trim long sentences to 25 words or fewer. Lose the long words and phrases and replace them with short, to the point words. Be as succinct as possible. Break up your text into small, manageable pieces with spaces in between.
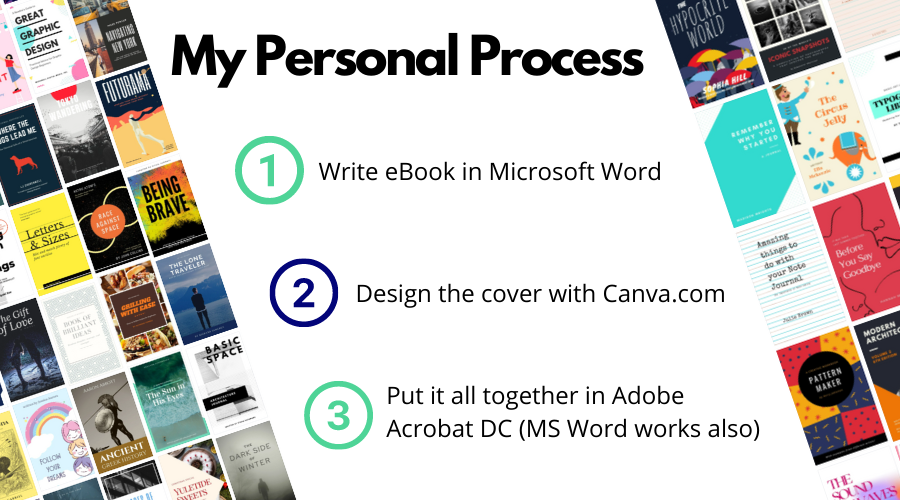
14. Choose the right layout for your book.
Entire books have been written simply on how to lay out a book, and I am no expert on this subject.
Instead, I’m going to refer you to an expertly written article for some free advice (link opens in new tab):
https://www.hubledigital.com/blog/10-top-tips-for-designing-an-ebook
15. Run a quick beta test of your new product.
Beta testing isn’t just for gamers and programmers. It’s for all creators, yourself included. Pick out a handful of people and ask them to read your book, request their honest feedback.
After each has read your masterpiece, tell them the pricing point you’re considering. Get their feedback on that as well. Oftentimes, a friend or family member will have an awesome idea of how you can enhance your book and charge a bit more.
16. Do some competitor research.
Check out your competitors sales pages. Watch their video sales letter, read all their sales content, download their lead magnets and sign up for their newsletter. Essentially, spy on them.
This will help you determine how you’re going to market your product.
- What sales phrases seem to work for them?
- What graphic styles are they using?
- Do they have any backend offers (I bet they do)?
17. Time to starting selling.
You’ve created an awesome product, and now it’s time to get it into the marketplace.
Write your sales letter, add bonuses, contact affiliates, email your list and so on.
18. Get started on your next profit-pulling product.
You have paying customers, you can ask for testimonials to increase social proof to better sell your next product.
You’ve captured email addresses and used sales and lead magnets to build your subscriber list. That means your next product will sell even faster.
You are now a legitimate product creator. Take a break and enjoy your success, but don’t wait too long to create your next bestseller. Wait too long and people will forget about you.


It’s the sales page where the magic happens. This is the page that gives you a return on your marketing investment. It is on this page where we convert visitors to paying customers. Do you know the valuable elements of a high-converting sales page? You will soon. Keep Learning >

One of the biggest assets you’ll ever create is your mailing list. You build trust and authority by sending highly relevant info that your subscribers can act on. Growing your subscribers doesn’t have to be difficult with these seven methods you can start right now. Keep Learning >